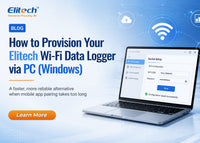
--A faster, more reliable alternative when mobile app pairing takes too long.
Why Use PC Provisioning?
Elitech Wi-Fi temperature and humidity data loggers can be provisioned through the mobile app. But in certain situations, using a Windows PC is a much better option:
- Mobile app pairing times out or takes too long — you've tried multiple times with no luck
- Complex Wi-Fi environments — the signal between your phone and the logger is unstable
- Batch deployment — you need to configure multiple loggers quickly and consistently
PC provisioning gives you clear visual feedback, faster write speeds, and a much smoother experience overall. Best of all, it only takes three simple steps.
What You'll Need

*Click ElitechIOTlog to download the software.
Video Tutorial
Text-Based Tutorial
Step 1: Download & Install ElitechIOTlog
1. Open your browser and go to the Elitech official website(https://elitechus.com)
2. Click the download icon at the bottom of this page.
3. Run the installer and follow the on-screen instructions
*Tip: Create a desktop shortcut for quick access in the future.
Step 2: Connect the Logger to Your PC
1. Plug your Elitech Wi-Fi data logger into your computer using the USB data cable
2. Launch the ElitechIOTlog program you just installed
3. The software will automatically recognize the connected device — you'll see it appear in the main window
*Note: If the device isn't detected, try a different USB port or cable. Some USB cables are charge-only and won't work for data transfer.
Step 3: Configure Wi-Fi Settings
This is the core step. It's straightforward, but accuracy matters.
1. In ElitechIOTlog, go to the Device Setup tab
2. Find the Wi-Fi configuration section and enter:
- Wi-Fi SSID — your network name (case-sensitive)
- Password — your Wi-Fi password
3. Double-check both fields for any typos
4. Click Save to write the settings to the device
5. The device stays in the Device Setup page, ready for further configuration
Step 4: Register Your Account & Add the Device
Once the Wi-Fi is configured, the logger is network-ready. Now you need to bind it to your cloud account.
Option A: Via the Elitech iCold Website
1. Go to the Elitech iCold web platform
2. Sign up for a new account, or log in if you already have one
3. Navigate to the Device Management page
4. Click Add Device
5. Enter the device's GUID (you'll find this on the device label or packaging)
6. Confirm — your device is now linked to your account
Option B: Via the Elitech iCold Mobile App
1. Download Elitech iCold from the App Store or Google Play
2. Sign up or log in
3. Tap Add Device
4. Enter the device GUID
5. Done — the device appears in your dashboard
What You Can Do After Provisioning
Once your logger is online and linked to your account, you get full remote access:

Troubleshooting
Device not detected by ElitechIOTlog?
- Make sure the USB cable supports data transfer (not just charging)
- Try a different USB port on your computer
- Restart ElitechIOTlog or reconnect the device
- Check Windows Device Manager for driver issues
Device saved Wi-Fi settings but won't connect?
- Verify the SSID and password are correct (watch for case sensitivity)
- Move the logger closer to the router and try again
- Check if your router has MAC address filtering enabled — you may need to whitelist the device
- Some enterprise or public networks with captive portals (login pages) are not supported
Can't find the GUID?
- Check the label on the device itself (side or back)
- Check the product packaging
- Some devices display the GUID inside ElitechIOTlog after connection
Recap: The Full Workflow

This guide applies to all Elitech Wi-Fi temperature and humidity data loggers. For technical support, contact your Elitech distributor or visit elitechus.com.

↑Click the icon to download ElitechIOTlog